Jan's Ceramic Creations Plus
  • Jan's Ceramic Creations Plus
  • New Arrivals
  • Bisque and/or Greenware
  • Cremation Urns
  • Parties and/or Classes
  • Location and Hours
  • Raku
  • Special orders
  • Blog
  • Store
  • Product

A ghostly guest

10/1/2013

0 Comments

 
Picture
We have a ghostly guest delivering a Halloween pumpkin for you.

Items needed:
Bisque ghost with pumpkin
OS 499 Cornsilk Yellow
OS 476 Black
OS 464 Bright Green
OS 484 Perismmon Khaki
OS 453  Grape
PL 184 Purple Iris
green chalk
brown chalk
pink chalk
black glitter (small)
purple glitter (lg.)
Matte spray


Steps:
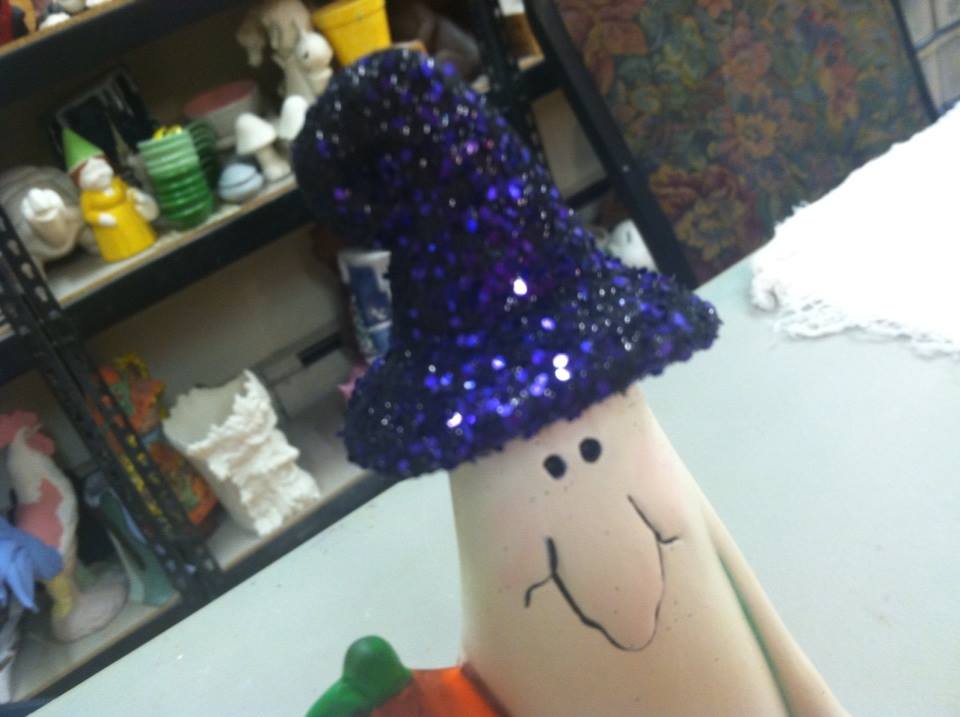
1. Paint the ghost with OS 499, making sure there are no spots.

2.  Paint the hat with OS 476, make sure to make a straight line up against the ghost, and there are no white spots.

3.  Paint the pumpkin with OS 484 making sure you have a straight line up against the ghost.

4. Paint the top of the pumpkin (stem, and leaf) with OS 464.

5. Paint the hands with OS 453, being very careful with the line work.  This is the second most tedious spot.

6. Take a very small brush to brush the eyes, and outline the mouth.  This is the most tedious spot.

Picture
7. Now that the piece has been painted all over, you need to spray your ghost with a matte sealer.

8. take a stiff brush to apply the green chalk to your piece.  You are going to line the sleeves of the ghost.
Picture
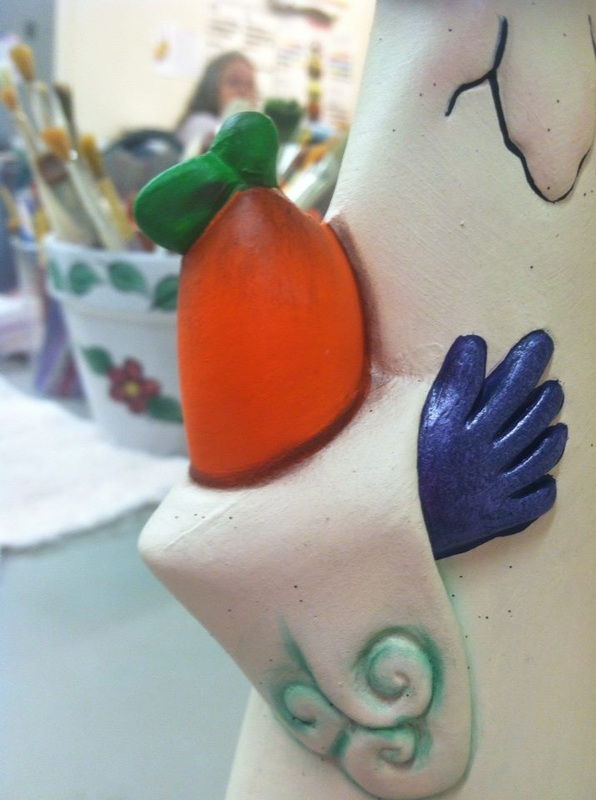
9. take another stiff brush to apply the brown chalk around the pumpkin, at the base of the pumpkin, and shadow the leaf.

10. take another stiff brush to apply the pink chalk to the cheeks and above the mouth of the ghost.

11. spray with a matte sealer

12. brush a think coat of PL 184 over the gloves

13. Lastly take the black glitter and mix with purple glitter.  Brush the hat with black paint, and while it is still wet sprinkle the glitter mix over the hat.  Slowly work around the hat until it is completely covered.
Picture
0 Comments

Fall harvest

9/19/2013

0 Comments

 
Picture
This is harvest time of year, and we have brought in a large harvest at the shop.

Here is a picture of pumpkins that we made using the same, or similar colors.  They definitely are different and unique. 

Here is the technique of the pumpkins.

A)The tall smile face pumpkin:
        EL 108 Jade Moss
        EL 121 Copper Adventurine
        EL 126 Coral Reef
         
    1. You brush one coat of EL 121 on the main part of the pumpkin and let it dry.
    2. Brush one coat of EL 126  on the main part of the pumpkin and let it dry.
    3. Brush one coat of EL 121 on the main part of the pumpkin and let it dry.
    4. Brush one coat of EL 126 on the main part of the pumpkin and let it dry.
    5. Brush three coats of EL 108 on the leaf and stem.
    6. Fire to a cone 06.

B) The squatty pumpkin:
            EL 108 Jade Moss
            EL 121 Copper Adventurine
            EL 126 Coral Reef
            Clear Glaze

        1. You brush one coat of EL 121 over the whole pumpkin.  Then let the pumpkin dry.  Once it is dry you take a wet sponge and wipe it back gently.  You can wipe back as much or as little as you want.  The one we did was wiped back quite a bit.
        2. Brush two coats of EL 126  over the lower portion of the pumpkin.
        3. Brush two coats of EL 108 over the stem of the pumpkin.
        4. Brush one coat of clear glaze over the whole pumpkin.
        5. Fire to a cone 06.
    
C) The slightly larger squatty pumpkin:
            EL 108 Jade Moss
            EL 121 Copper Adventurine
            EL 126 Coral Reef
    1. Brush one coat of EL 126 over the lower portion of the pumpkin.
    2. Brush two coats of EL 121 over the lower portion of the pumpkin.  Make sure to let it dry in between each coat.
    3. Brush three coats of EL 108 over the stem of the pumpkin.  And make sure to let it dry in between each coat.
    4. Fire cone to 06

D) The short smiley pumpkin.
                EL 108 Jade Moss
                EL 121 Copper Adventurine
                EL  126 Coral Reef
  
      1. Brush one coat of EL126 over the lower portion of the pumpkin. Let it dry.
       2. Brush one coat EL 121 over the lower portions of the pumpkin.  Let it dry.
        3. Brush one coat of EL 126 over the lower portions of the pumpkin.  Let it dry.
        4. Brush one coat of EL 121 over the lower portions of the pumpkin.  Let it dry.
        5. Brush three coats of EL 108 over the stem and leaf.  Let it dry in between each coat.
        6. Fire to cone 06.

E) The tall pumpkin in the back.
               EL 108 Jade Moss
               EL 121 Copper Adventurine
    
        1. Brush three coats of EL 121 over the lower portion of the pumpkin.  Let it dry in between each coat.
        2. Brush three coats of EL 108 over the stem and leaf of pumpkin.  Let it dry in between each coat.
        3. Fire to cone 06

F)Tall pumpkin in the back right.
                   EL 108 Jade Moss
                    EL 121 Copper Adventurine
                    EL  126 Coral Reef
    
    1.  Brush two coats of EL 126 over the lower portion of the pumpkin.  Let it dry in between each coat.
     2. Brush one coat of EL 121 over the lower portion of the pumpkin.  Let it dry.
    3. Brush three coats of EL 108 over the stem and leaf of pumpkin.  Let it dry in between each coat.
    4. Fire to cone 06

F) The short pumpkin to the right.
                    EL 108 Jade Moss
                    EL  121 Copper Adventurine
                    SC 75 Orange-a-peel

        1.  Brush one coat of EL 121 on the lower portion of the pumpkin.  let it dry.
        2 Brush two coats of SC 75 over the lower portion of the pumpkin.  Let it dry.
        3. Brush three coats of EL 108 over the stem and leaf of the pumpkin.  Let it dry.
        4. Fire to cone 06


0 Comments
Forward>>

    Author

    New and creative ideas that come to mind.  Something to hence someone

    Archives

    May 2017
    August 2016
    March 2016
    January 2016
    September 2015
    January 2015
    December 2014
    October 2014
    October 2013
    September 2013

    Categories

    All

    RSS Feed

Proudly powered by Weebly